How to use Sass in ASP.NET Core 2.0 MVC

In this post we are going to look at how to set up and compile Sass in ASP.NET Core 2.0 MVC.
This is my third post on ASP.NET Core 2.0, if you are new to ASP.NET Core then it is worth checking them out.
Previous posts:
- Create a minimal ASP.NET Core 2.0 MVC web application
- How to serve static files in ASP.NET Core 2.0 MVC
Back in 2014 I wrote about how to compile Sass in Visual Studio using Grunt and Task Runner Explorer. This is still my process for compiling Sass in my projects. Now that I am porting my projects over to ASP.NET Core it's time to find out what has changed when using a CSS preprocessor such as Sass.
Choose the task runner of your choice
For this post I am using Grunt but you could also use Glup, it's purely a matter of choice. All my existing projects use Grunt so I'm going to continue using that.
Objectives
Our goals are:
- Add Grunt to the project
- Add Sass to the project
- Compile Sass to Css using Grunt
Assumptions
This article assumes the following:
- Node.js is installed. If you do not have it go install it first.
- You are using Visual Studio on a Windows PC (isn't it great that it's no longer an assumption you are using Windows!).
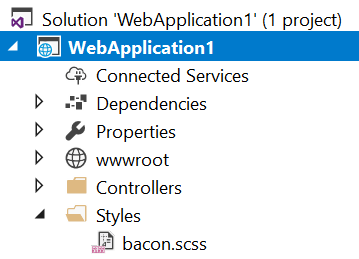
Add your Sass file
Start by adding a Sass file to your project. Create a folder in the root of the project, I've kept mine generic and called it Styles, you could call it Sass or what ever you like. Now add a Sass file to the folder.
Using npm
We are going to using Node Package Manager (npm) to install the components we need. The packages used are stored in package.json. This is added to the root of the project and is done so by running the following command in command prompt.
npm init
Adding Grunt
First, let's install Grunt.
npm install grunt --save-dev
Now add Grunt's command line interface (CLI) to the project. The CLI runs the installed version of Grunt.
npm install grunt-cli --save-dev
Note: For this article we are installing Grunt and the CLI for the local project, but if you are going to be using Grunt for other projects it is worth installing both globally.
Adding Sass
Use grunt-sass to compile Sass. This package uses LibSass, a C/C++ port of the Ruby Sass engine. If you are on a Windows machine you can use this without the need to install Ruby. grunt-contrib-sass uses the original Ruby based engine. grunt-sass is installed with this command.
npm install grunt-sass --save-dev
The Gruntfile
With the packages installed add a js file to the root of the project called gruntfile.js. Here we will add a task to compile Sass.
module.exports = function (grunt) {
    'use strict';

    // Project configuration.
    grunt.initConfig({
        pkg: grunt.file.readJSON('package.json'),

        // Sass
        sass: {
            options: {
                sourceMap: true, // Create source map
                outputStyle: 'compressed' // Minify output
            },
            dist: {
                files: [
                    {
                        expand: true, // Recursive
                        cwd: "Styles", // The startup directory
                        src: ["**/*.scss"], // Source files
                        dest: "wwwroot/css", // Destination
                        ext: ".css" // File extension
                    }
                ]
            }
        }
    });

    // Load the plugin
    grunt.loadNpmTasks('grunt-sass');

    // Default task(s).
    grunt.registerTask('default', ['sass']);
};
The main points to note are;
- The startup directory is Styles
- we've set
srcto be recursive so we can add a folder structure and it will still work - The destination for the css is wwwroot/css
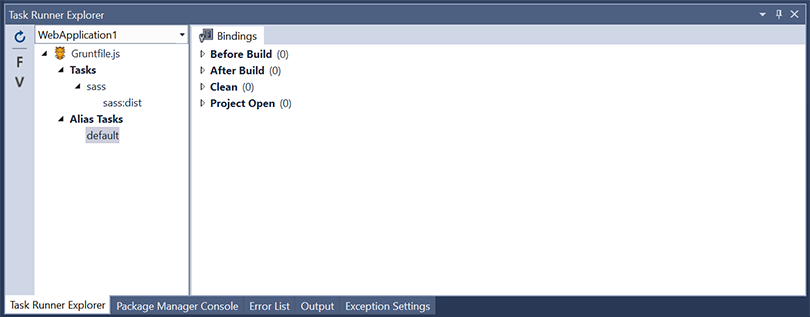
Running the task
Everything is now ready to run. Open Task Runner Explorer in Visual Studio from the tool bar View -> Other Windows -> Task Runner Explorer or right click on gruntfile.js in the Solution Explorer and select Task Runner Explorer.
You can run the task (named default) from there.
Note: If you get this error when running the task (I did), follow this stack overflow answer to fix it.
>> Node Sass could not find a binding for your current environment: Windows 64-bit with Node.js 5.x
>>
>> Found bindings for the following environments:
>>   - Windows 64-bit with Node.js 6.x
>>
>> This usually happens because your environment has changed since running `npm install`.
>> Run `npm rebuild node-sass --force` to build the binding for your current environment.
Warning: Task "sass" not found. Use --force to continue.
Aborted due to warnings.
Task binding options
Having to manually run the task each time could become tiring very quickly. Luckily there are some build options available. In Task Runner Explorer right click the task and select Bindings for four compilation options.
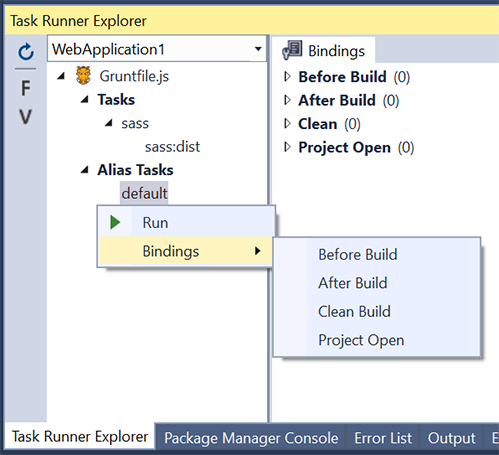
Selecting After Build for example will run the grunt task after every build. Selecting a binding adds a reference at the top of gruntfile.js like this.
/// <binding AfterBuild='default' />
Summary
In this article we have used Grunt to compile Sass to css and added a binding to automatically compile after every build. As you can see it is very straightforward, completely flexible and extendible. You can easily add other packages such as linting or prefixing. In terms of the process very little has changed, the only difference is you must now compile css to the wwwroot folder. This is good news for those who are migrating projects to ASP.NET Core.